以前から形態素解析を用いた全文検索に興味を持っており、「Elasticsearchで日本語検索を扱うためのマッピング定義 - ZOZO TECH BLOG」を読んで「kuromoji analyzer」を試してみたくなりました。トークンフィルタで不要な品詞の除去や長音の除去ができることなどが良さそうです。
Elasticsearch・Kibanaの準備とマッピング定義
まず「無料かつオープンなElastic Stack」からElasticsearchとKibanaをダウンロードしました。コマンドを実行するだけで起動できるので検証・開発には便利そうです。
Elasticsearchのインデックスにドキュメントを登録すれば自動でマッピングされる機能もありましたが、今回は先程のZOZO TECH BLOGを参考にマッピングを行いました。これをKibanaのコンソールを使用してAPIリクエストを実行します。
{
    "settings": {
        "analysis": {
            "analyzer": {
                "my_ja_analyzer": {
                    "type": "custom",
                    "char_filter": [
                        "icu_normalizer"
                    ],
                    "tokenizer": "kuromoji_tokenizer",
                    "filter": [
                        "kuromoji_baseform",
                        "kuromoji_part_of_speech",
                        "ja_stop",
                        "kuromoji_number",
                        "kuromoji_stemmer"
                    ]
                }
            }
        }
    },
    "mappings": {
        "properties": {
            "model": {
                "type": "keyword"
            },
            "workspace_id": {
                "type": "integer"
            },
            "object_id": {
                "type": "integer"
            },
            "url": {
                "type": "keyword"
            },
            "title": {
                "type": "text",
                "analyzer": "my_ja_analyzer"
            },
            "content": {
                "type": "text",
                "analyzer": "my_ja_analyzer"
            },
            "excerpt": {
                "type": "text",
                "analyzer": "my_ja_analyzer"
            },
            "tags": {
                "type": "keyword"
            },
            "published_on": {
                "type": "date"
            }
        }
    }
}
インデックスにドキュメントを登録する
マッピング同様にKibanaのコンソールを利用してAPIリクエストをすれば良いのですが、試行錯誤するためには簡単に再登録ができる方が便利ですので、PowerCMS Xの記事を抽出してBulk APIで投入できるようにプログラムを書いてみました。「Elasticsearch-PHP」を利用しました。
プラグイン化はまだなので関数を定義していませんし決め打ちしているところがありますが、ワークスペースのビューにインデックスに登録するコンテンツを記述したJSON文字列を生成するテンプレートを書き、バルク登録時にビルドしています。今は記事の本文を突っ込むだけですが、実際のプロジェクトだと色々なモデルやカラムがあること、プロパティの定義によって検索の質も変わりそうなことから、自動化するよりも開発者がビューで細かく定義できる方が良いだろうと考えています。
{
  "model": "entry",
  "object_id": <mt:entryid />,
  "workspace_id": <mt:workspaceid />,
  "url": "<mt:entrypermalink encode_json />",
  "title":"<mt:entrytitle encode_json />",
  "content": "<mt:entrytext convert_breaks="auto" remove_html regex_replace="'/\n/',''" encode_json />",
  "published_on": "<mt:entrypublishedon format_ts="c" />"
}
<?php

require_once '/Users/Shared/Sites/powercmsx/app/class.Prototype.php';
require_once '/Users/Shared/Sites/powercmsx/vendor/autoload.php';

use Elastic\Elasticsearch\ClientBuilder;

Dotenv\Dotenv::createImmutable(__DIR__)->load();

$app = new Prototype(['id' => 'Prototype']);
$app->logging = true;
$app->init();
$app->init_tags();

$client = ClientBuilder::create()
    ->setHosts(['https://localhost:9200'])
    ->setSSLVerification(false)
    ->setApiKey($_ENV['ELASTICSEARCH_API_KEY'])
    ->build();
$params = ['body' => []];
$counter = 0;

$targetModel = 'entry';
$objects = $app->db->model($targetModel)->load([
    'rev_type' => 0,
    'status' => 4,
    'workspace_id' => 6,
]);
$template = $app->db->model('template')->load([
    'basename' => 'elasticsearch',
    'workspace_id' => 6,
])[0];
$workspace = $app->db->model('workspace')->load(6);

foreach ($objects as $object) {
    $counter += 1;

    $params['body'][] = [
        'index' => [
            '_index' => 'blog',
            '_id'    => "{$targetModel}_{$object->id}",
        ]
    ];

    $app->ctx->stash('current_context', $targetModel);
    $app->ctx->stash($targetModel, $object);
    $app->ctx->stash('workspace', $workspace);
    $jsonString = $app->ctx->build($template->text);
    $params['body'][] = json_decode($jsonString, true);

    // Every 200 documents stop and send the bulk request
    if ($counter % 200 === 0) {
        $responses = $client->bulk($params);

        // erase the old bulk request
        $params = ['body' => []];

        // unset the bulk response when you are done to save memory
        unset($responses);
    }
}

// Send the last batch if it exists
if (!empty($params['body'])) {
    $responses = $client->bulk($params);
}
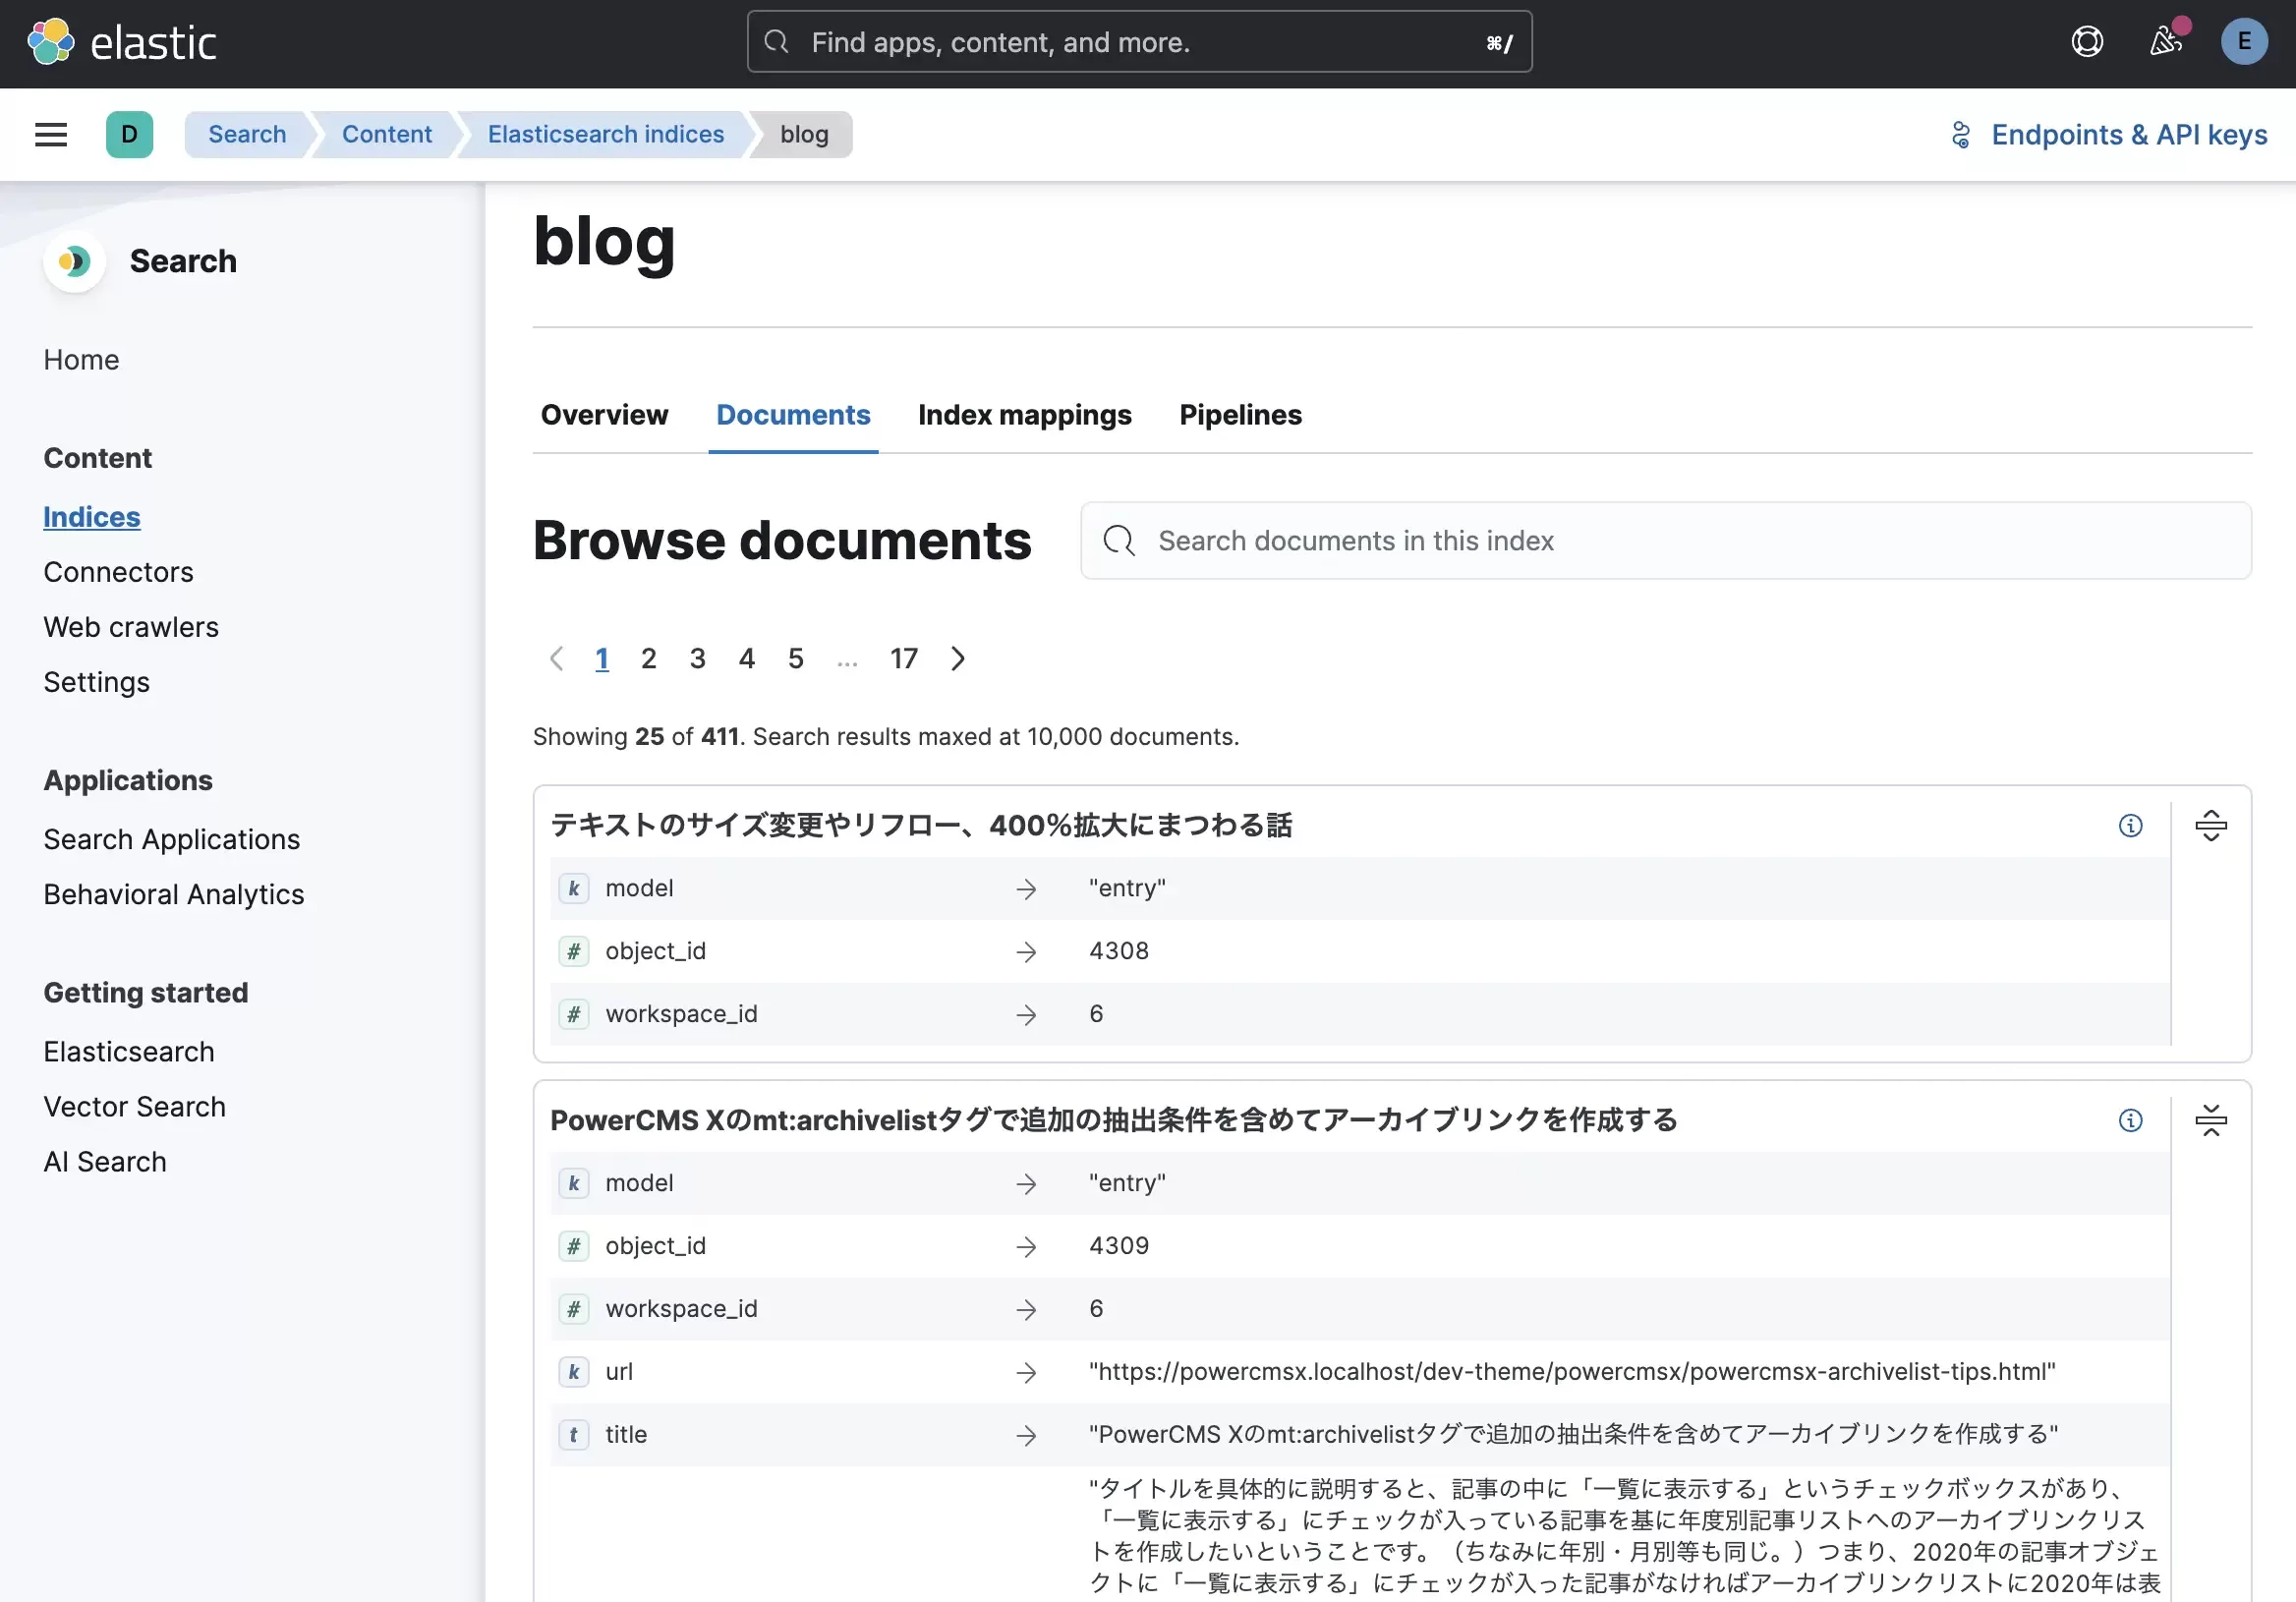
これを実行してKibanaでインデックスを確認するとドキュメントが登録されていました。
検索ページを作成する
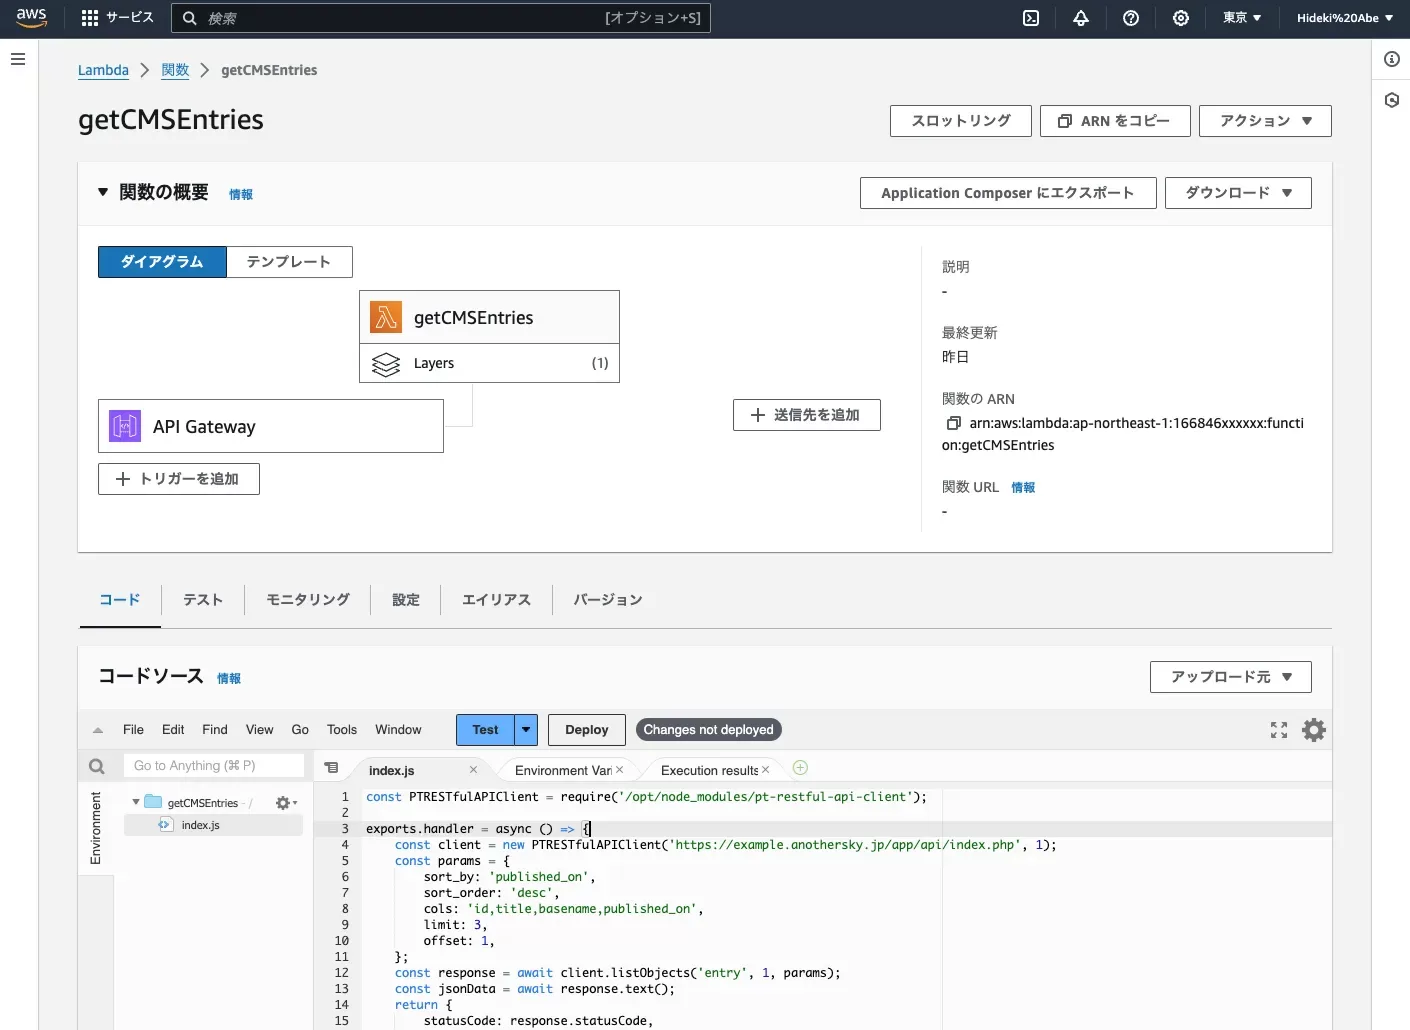
MTElasticsearchresultブロックタグを実装し、ダイナミック・パブリッシングでURLにクエリを付けてリクエストをするとElasticsearchで検索した結果を返すようにしました。これもとりあえず動く状態を作り、必要に応じて改変していきたいと思います。検索条件を配列に書いてElasticsearchのPHPクライアント渡せば良いのですが、ここがとても奥が深そうです。
load();

class Elasticsearch extends PTPlugin
{

    public function __construct()
    {
        parent::__construct();
    }

    public function elasticsearchResultBlockTag($args, $content, $ctx, &$repeat, $counter)
    {
        $localVars = [];
        $app = $ctx->app;

        if (!$counter) {
            $client = ClientBuilder::create()
                ->setHosts(['https://localhost:9200'])
                ->setSSLVerification(false)
                ->setApiKey($_ENV['ELASTICSEARCH_API_KEY'])
                ->build();
            $searchParams = [
                'index' => 'blog',
                'body'  => [
                    'query' => [
                        'multi_match' => [
                            'query' => $args['query'],
                            'fields' => ['title^2', 'content'],
                        ],
                    ],
                ],
                'from' => empty($args['offset']) ? 0 : $args['offset'],
                'size' => empty($args['limit']) ? 10 : $args['limit'],
            ];
            $response = $client->search($searchParams);
            $hits = $response['hits']['hits'];

            if (empty($hits)) {
                $repeat = $ctx->false();
                return;
            }

            if (!empty($localVars)) {
                $ctx->localize($localVars);
            }

            $ctx->localParams = $hits;
        }

        if (!isset($hits)) {
            $hits = $ctx->localParams;
        }

        $ctx->set_loop_vars($counter, $hits);

        if (isset($hits[$counter])) {
            $repeat = true;
            $ctx->local_vars['score'] = $hits[$counter]['_score'];
            $ctx->local_vars['url'] = $hits[$counter]['_source']['url'];
            $ctx->local_vars['title'] = $hits[$counter]['_source']['title'];
        } else {
            unset($hits);

            if (!empty($localVars)) {
                $ctx->restore($localVars);
            }

            $repeat = $ctx->false();
        }

        return ($counter > 1 && isset($args['glue'])) ? $args['glue'] . $content : $content;
    }
}
ビューを実行すると検索結果が表示されました。
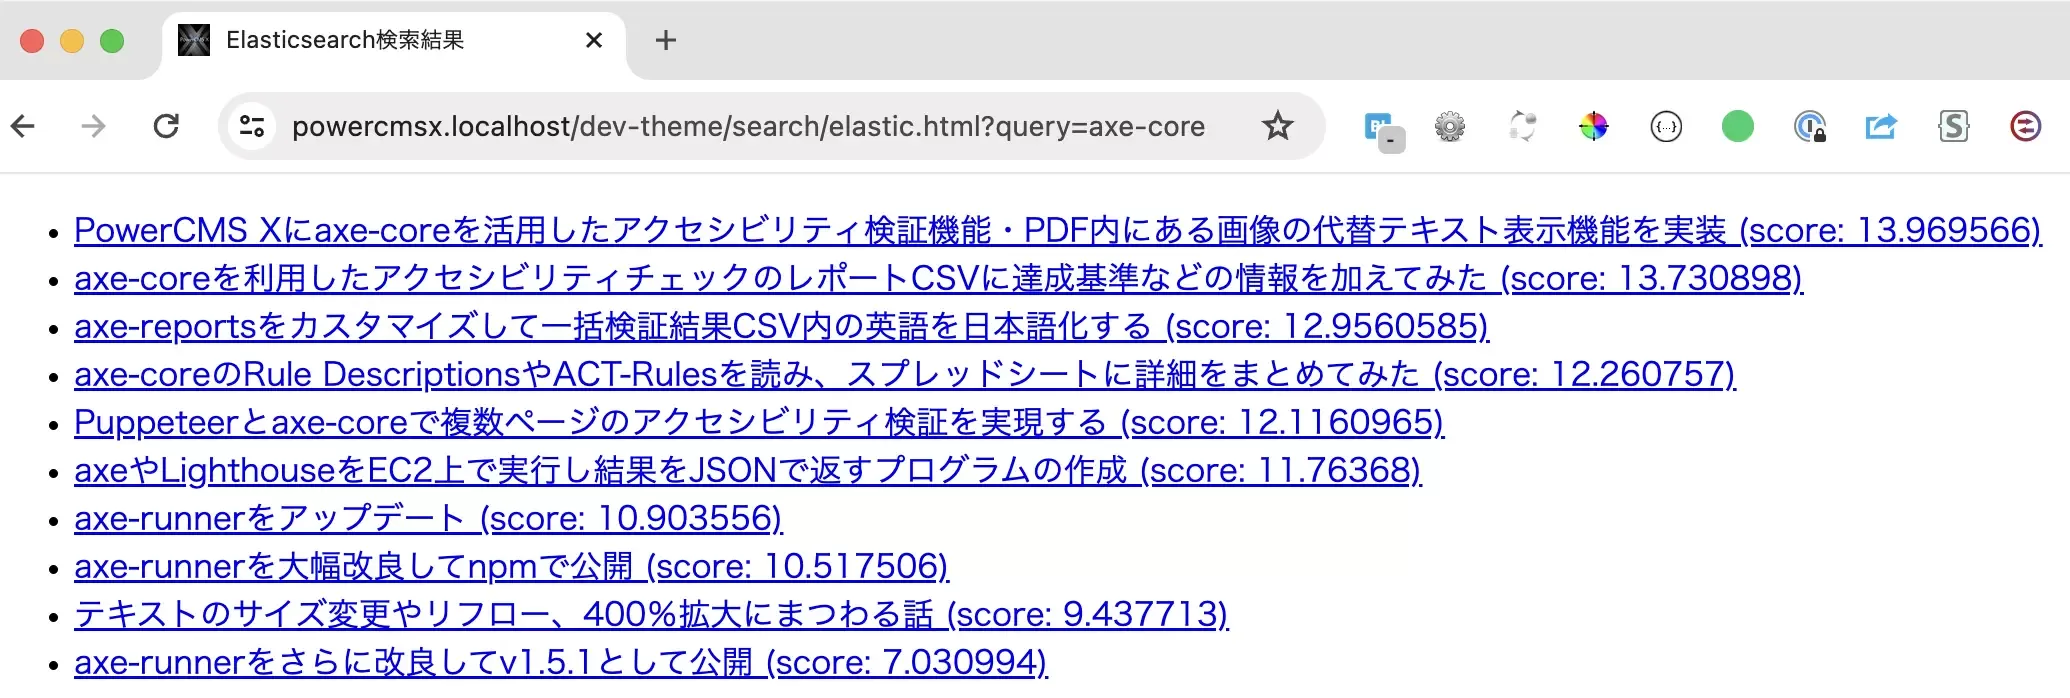
検索対象フィールドの指定にてtitle^2のように書くことでタイトルに重み付けができるところも好みです。
余談
今気付いたのですが、朝日新聞社 Advent Calendar 2022の17日目に「PHPを使ってOpenSearchServiceで日本語全文検索する(Official PHP Client for OpenSearchを用いて) #AWS - Qiita」という記事があって、Kuromojiの話も出ていましたね。
あと、サイト内検索はどれぐらい使われるのだろう?と考えました。プロジェクトであれば昔からGoogle Analytics等でデータが取れているかと思います。
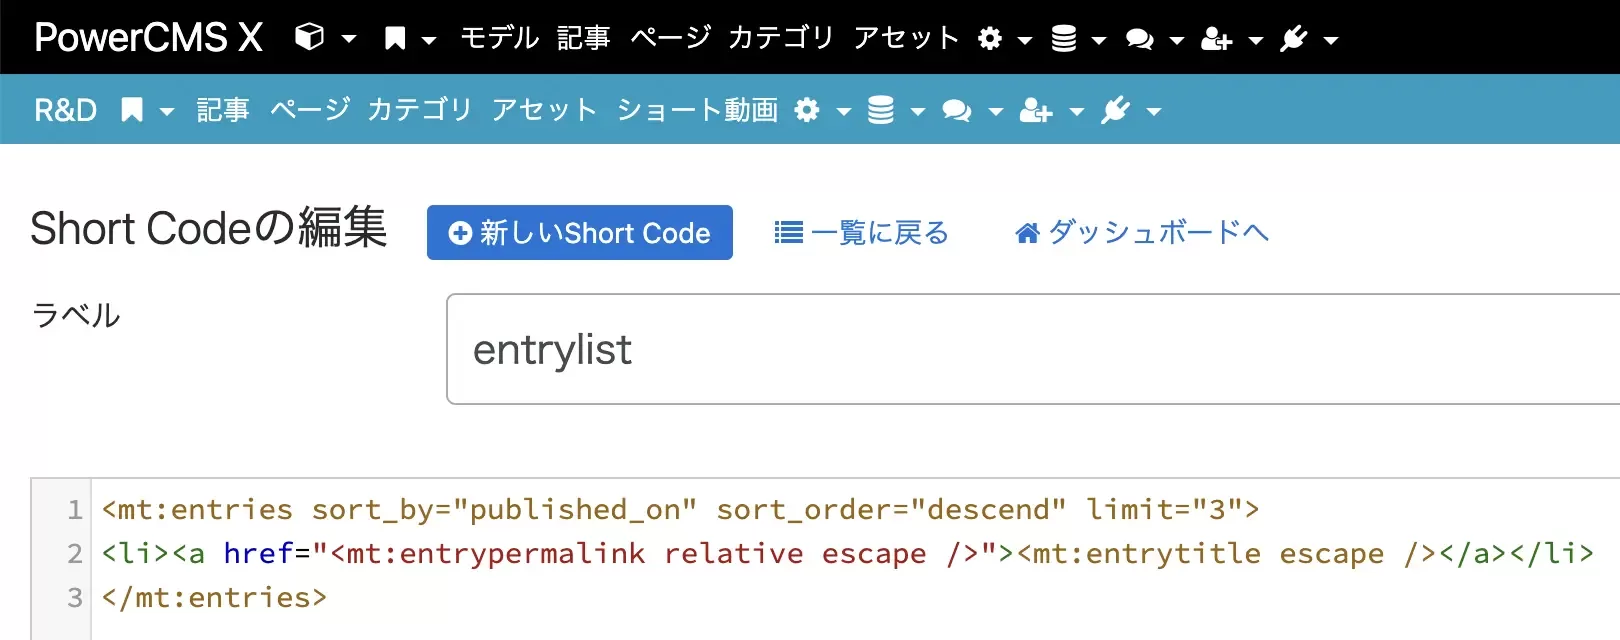
]]>